
Introduction: The Daily Ritual That Changes Everything
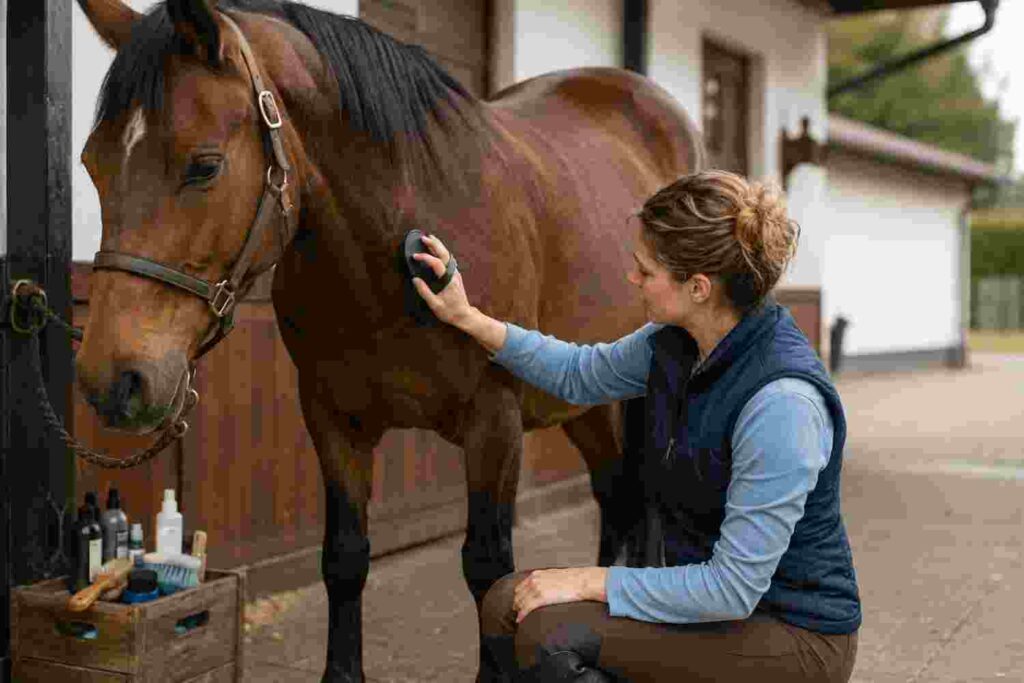
The first time you groom a horse, something unexpected happens. You pick up the curry comb, start moving it in slow circles across the horse’s coat, and feel the animal relax beneath your hands. The tension in its neck releases. Its lower lip droops slightly. It shifts its weight, leans into the pressure, and sighs.
You are no longer a stranger. You are beginning to be trusted.
That moment — quiet, unhurried, deeply physical — is the foundation of everything in horsemanship. Before you learn to ride. Before you master any skill. Before you understand training theory or nutrition science or veterinary care. The daily grooming session is where the relationship between horse and human is built, maintained, and deepened.
But grooming is not only about relationship. < cite index=”36-1″>Daily grooming helps prevent skin diseases, increases circulation and promotes a shiny coat. Thorough grooming also allows owners to check over their horse’s entire body.</cite> Done correctly and consistently, it is one of the most powerful health monitoring tools available to a horse owner — a daily hands-on examination that can detect injuries, infections, heat, swelling, and behavioral changes long before they become serious problems.
For new horse owners, the grooming routine can feel overwhelming at first. There are brushes with confusing names. There is a sequence that seems arbitrary until you understand the logic behind it. There is hoof care, which involves tools, technique, and the slightly terrifying business of picking up a large animal’s foot. There are vital signs to learn, health indicators to recognize, and daily checks to perform that veterinarians recommend but nobody always explains.
This guide covers all of it — from the tools in your grooming kit to the vital signs on your checklist, from the step-by-step grooming sequence to the warning signs that mean call the vet now. It is written specifically for beginners: honest, practical, and detailed enough to actually use.
By the end, you will know not just what to do — but why, and how to recognize when something is wrong.
Part One: Understanding Why Grooming Matters
More Than Aesthetics
Experienced horse owners sometimes describe grooming as the most important 20 minutes of their day. That might sound like an exaggeration until you understand everything those 20 minutes accomplish:
Skin and coat health. A horse’s coat is a living ecosystem of skin, hair follicles, natural oils, and — without regular grooming — accumulated sweat, dirt, mud, and dead skin cells. Regular brushing distributes the skin’s natural oils along the hair shaft, removes debris, stimulates blood circulation to the skin, and prevents the buildup of conditions that lead to dermatitis, rain rot, and other skin diseases.
Early problem detection. < cite index=”37-1″>Spending time grooming your horse on a regular basis means that you will be much more likely to spot potentially serious health issues or injuries before they become a major problem. You can then seek veterinary care while the condition is easily treatable.</cite> A cut hidden under a muddy coat, a swollen leg from an overnight knock, a patch of skin warmer than the surrounding area — these are findings that can change a horse’s outcome, and grooming is how you find them.
Prevention of tack-related injury. < cite index=”37-1″>Grooming before riding ensures that the coat is clean, which reduces the chances of chafing once you put on tack. This means their riding session will be nice and comfortable.</cite> A single small stone or clump of dried mud trapped under a saddle pad can cause significant pressure sores within a single ride. Grooming eliminates this risk.
Trust and relationship building. < cite index=”38-1″>A well-organized grooming kit equipped with essential tools improves efficiency and protects sensitive areas. A step-by-step process from hoof cleaning to final polishing encourages calm behaviour and strengthens horse-human rapport.</cite> The horse who is handled calmly, consistently, and gently every day is the horse who stands quietly for the vet, the farrier, and the trailer loading. Daily grooming is daily trust training.
Mental stimulation and stress reduction. Horses are social animals that groom each other in the wild as both a practical and social behavior. Human grooming taps into this instinct, providing physical pleasure, social connection, and a calming routine that reduces stress in stabled horses who lack the herd contact of their natural environment.
Part Two: Building Your Grooming Kit
The Essential Tools — What You Actually Need
Walk into any equine supply store and the grooming section can be overwhelming. The following guide cuts through the marketing and tells you exactly what you need, why, and how each tool is used.
The Curry Comb This is where every grooming session begins. A rubber or plastic curry comb — oval or round, with short flexible teeth — is used in circular motions to loosen dried mud, caked sweat, and dead skin cells from the coat. It reaches the skin and brings debris to the surface where it can be brushed away.
A rubber curry comb is generally preferred for beginners because it is flexible and less likely to cause discomfort. Use it with firm, circular pressure on the main body — neck, shoulder, barrel, hindquarters — but never on the legs below the knee or hock, the bony face, or any area where the bone is close to the surface.
The Dandy Brush (Hard Brush) A stiff-bristled brush with a wooden or plastic back, the dandy brush flicks away the loosened dirt the curry comb has brought to the surface. Use it with short, flicking strokes that lift debris out of the coat rather than simply redistributing it. Like the curry comb, use it on the body but avoid very sensitive areas and bony legs.
The Body Brush (Soft Brush) A soft-bristled brush used after the dandy brush to remove fine dust and polish the coat to a shine. The body brush can be used everywhere — including the face and legs — and leaves the coat smooth and gleaming. Use long, sweeping strokes following the direction of hair growth.
The Hoof Pick < cite index=”40-1″>A hoof pick is one of the most important horse grooming tools. It removes stones, mud, and debris from the horse’s hooves to prevent discomfort and infection.</cite> A simple metal hook with a handle, the hoof pick is used to clean debris from the sole and grooves of the hoof. Many hoof picks include a small brush at one end for removing fine debris after picking. This is a non-negotiable daily tool — never skip it.
The Mane and Tail Comb or Brush A wide-tooth comb or a stiff mane and tail brush for detangling and tidying the mane and tail. Wide-tooth combs cause less breakage than fine-tooth combs. < cite index=”39-1″>Use a wide-tooth comb or mane brush to gently work out any knots. Start at the bottom of the mane or tail and work your way up.</cite> Work from the bottom up to minimize breakage of long hair.
Sponge or Soft Cloth For cleaning sensitive areas that brushes should not touch: the eyes, nostrils, and dock (the area under the tail). < cite index=”39-1″>For sensitive areas like the eyes, nose, and underside of the tail, use a clean, damp cloth or sponge. It’s important to have separate washcloths for the face and tail area to maintain hygiene.</cite> Use separate sponges for face and dock — this is a basic hygiene requirement, not optional.
Sweat Scraper A curved metal or rubber tool used after bathing or heavy exercise to scrape excess water from the coat, significantly speeding up drying time. Not needed for daily dry grooming but essential after every wash or sweaty workout.
Metal Curry Comb (Groomer’s Tool) This is used NOT on the horse — it is used to clean the body brush. After every few strokes with the body brush, draw it across the metal curry comb to remove the accumulated dust and debris. This keeps the body brush clean and working effectively throughout the grooming session.
Optional but Useful Tools
Shedding blade — a toothed blade with a handle at each end, used in spring to remove the heavy winter coat as it sheds. Dramatically speeds up coat change season.
Face brush — a very small, very soft brush specifically for cleaning the delicate structures of the face: around the eyes, the bridge of the nose, and the ears.
Mane pulling comb — a short, fine-toothed comb used for thinning and pulling the mane to a manageable thickness and length. A skill to learn gradually.
Hoof oil or conditioner — applied to the hoof wall and sometimes the sole to maintain moisture balance, particularly in very dry or very wet conditions.
Part Three: The Step-by-Step Grooming Sequence
Before You Begin — Safety First
Before touching your horse with a brush, there are non-negotiable safety practices that every beginner must establish as habit:
Tie the horse securely. Always tie your horse before grooming — a quick-release knot to a solid, appropriate tie ring. A horse that is free to move is a horse that can step on your foot, swing its hindquarters into you, or simply walk away with your grooming kit.
Approach correctly. Always approach a horse from the front or side — never from directly behind. Horses have a blind spot directly behind them and may kick in startled reaction to unexpected touch from that direction. Speak calmly as you approach so the horse is aware of your presence before you make contact.
Stay aware of your position. When working around a horse’s legs or hindquarters, position yourself close to the body — not at arm’s length. A horse can kick hard from a distance; if you are close to the body, the kick has less power and momentum. This is counterintuitive for beginners but critical for safety.
Read the horse’s body language. Before and throughout grooming, watch for signs of discomfort or agitation: pinned ears, swishing tail, tensed muscles, a swinging hindquarter, or a warning nip. These are communications, not misbehavior — they tell you something is uncomfortable or wrong.
Step 1: Pick the Hooves
Always begin with the hooves. This is the sequence that experienced horsepersons use, and the reason is practical: you want to check and clean the feet before anything else gets stirred up, and hoof picking removes the largest debris source first.
How to lift a front hoof: Stand facing the horse’s tail (beside the shoulder, facing backward). Run your hand firmly and calmly down the back of the leg from the knee toward the fetlock. As your hand reaches the fetlock, apply gentle but deliberate pressure and say a verbal cue if the horse is trained to one (“up,” “foot,” etc.). Most horses will shift their weight and lift the foot. Support the lifted hoof in your near hand — cradle it, don’t grip it — and hold the hoof pick in your other hand.
How to lift a hind hoof: Stand beside the hindquarter, facing backward. Run your hand down the back of the hind leg from the gaskin (the large muscle above the hock) down toward the fetlock, applying firm, steady pressure. The technique is similar — the horse shifts weight and lifts. Support the hock with your near hand as you clean.
How to use the hoof pick: < cite index=”41-1″>Use a hoof pick to scrape out dirt, starting from the heel corners and working toward the toe.</cite> Work from the back of the foot toward the toe, staying in the grooves on either side of the central structure (the frog) and around the frog itself. The key instruction: < cite index=”41-1″>be sure to avoid digging into the triangular frog of the hoof.</cite> The frog is a sensitive, V-shaped rubbery structure that plays an important role in blood circulation and shock absorption — it should be cleaned around, never aggressively probed.
< cite index=”37-1″>If your horse is shod, pick around the inside of the shoe to remove any pebbles.</cite> For barefoot horses, clean the entire sole area thoroughly.
What to check while picking: After cleaning, before setting the foot down, take 5 seconds to inspect what you see:
- Thrush: A dark, foul-smelling discharge from the clefts around and beside the frog. < cite index=”37-1″>A common problem is thrush, most obviously signified by a dark discharge from the frog area.</cite> Thrush is a bacterial infection caused by standing in wet or dirty conditions — it is treatable if caught early and serious if not.
- Cracks in the hoof wall: Small surface cracks are common and often benign; long, deep cracks need farrier attention.
- Bruising: A reddish or purple discoloration on the sole indicates bruising — the horse may be sore.
- Loose or missing shoes: Check that all shoes are seated correctly with no risen clinches (the bent-over nail ends) and that no shoe is wobbling, twisted, or missing entirely.
- Heat or sensitivity: Note if one foot feels significantly warmer than the others or if the horse flinches when weight is applied. This can indicate inflammation, infection, or laminitis.
Repeat for all four feet. Gently lower each foot to the ground — never drop it.
Step 2: Curry Comb the Body
Begin at the neck and work systematically over the entire body: neck → shoulder → barrel → hindquarters → the other side. Use firm, circular strokes, leaning into the pressure slightly.
Watch the coat as you work — you should see dust and debris rising from the skin. If a particular area seems sensitive (the horse flinches, pins ears, or moves away), note it. This is information — pain or discomfort in a specific area that may need investigation.
Never use the curry comb on:
- The legs below the knee or hock (too little muscle cushioning, too sensitive)
- The bony ridges of the face
- The ears
- Any open wound or irritated skin area
Pay extra attention to:
- The girth area (where the saddle girth sits) — sweat and dirt accumulate here and can cause girth galls (sores)
- The area under the mane
- The area between the hind legs (the inner thighs), which can get dirty and chafed
Step 3: Dandy Brush
Follow the curry comb with the dandy brush — short, flicking strokes that remove the loosened debris from the coat. Work in the same systematic order. The flicking action is important: you are lifting dirt out of the coat, not pushing it deeper.
The dandy brush can be used slightly lower on the legs than the curry comb but use reduced pressure on bony, thin-skinned areas.
Clean the dandy brush against the metal curry comb every few passes to prevent simply redistributing dirt across the coat.
Step 4: Body Brush
The body brush is the finishing brush — softer, finer, and usable everywhere. Long, sweeping strokes following the direction of hair growth bring up the natural oil and polish the coat to a shine.
The body brush can be used on the face, the legs, and inside the ear (gently). It is the most versatile brush in the kit and the one that produces the visible result of a well-groomed horse.
Clean it against the metal curry comb frequently — a dirty body brush simply moves dirt around.
Step 5: Face and Sensitive Areas
Using the soft face brush or a damp cloth:
- Clean around each eye, removing any discharge or debris from the corners
- Clean the nostrils gently, removing any dried secretion
- Check the inside of the ears (a small amount of dark wax is normal; copious discharge is not)
Then switch to the separate dock sponge:
- Lift the tail and clean the dock area (the base of the tail where it meets the body) — an area that accumulates sweat and debris and can develop itchy, irritated skin if neglected
- Clean the underside of the tail
Step 6: Mane and Tail
< cite index=”39-1″>Start at the bottom of the mane or tail and work your way up.</cite> This is the opposite of instinct but essential to avoid breaking hair. Work through small sections at a time, holding the hair above the section you are detangling to prevent pain from pulling at the root.
A detangling spray used sparingly can significantly ease this process for horses with particularly thick or tangled manes and tails.
Safety note for tails: < cite index=”39-1″>Always stay close to your horse’s body, never stand directly behind them.</cite> When detangling the tail, stand to one side of the hindquarters, reaching across to work the tail — not directly behind where a kick could reach full force.
Step 7: Final Inspection
< cite index=”41-1″>Check for cuts, swelling, heat, or unusual signs before saddling.</cite> Before finishing, do a final slow pass over the entire horse — not brushing but looking and touching. Run your hands down each leg feeling for heat and swelling. Check the eyes for clarity and discharge. Note any new marks, cuts, or hair loss. Look at the horse’s overall demeanor — is it bright and interested, or dull and withdrawn?
This 2-minute final check, done consistently, is what catches the problems before they become emergencies.
Part Four: Hoof Care in Depth
Understanding the Hoof
The hoof is one of the most remarkable structures in nature — a complex assembly of bone, cartilage, connective tissue, blood vessels, and specialized keratinized structures that supports an animal weighing 450–700 kilograms (1,000–1,500 pounds) across varied terrain at speeds up to 70 kilometers per hour.
Its health is foundational to the horse’s soundness. < cite index=”35-1″>Horse hoof care is a fundamental part of ensuring your horse’s health and performance. By dedicating regular attention to this crucial aspect, you’ll help prevent concerns like lameness, infections, and structural problems that can impact their well-being.</cite>
Key structures every beginner should know:
The hoof wall — the hard outer structure, equivalent to a human fingernail but vastly thicker and stronger. The hoof wall bears most of the horse’s weight and can develop cracks — superficial (usually cosmetic) or deep (potentially serious).
The sole — the flat underside of the hoof inside the hoof wall. A healthy sole is concave (slightly curved upward) and firm. A flat or convex sole (dropped sole) is a serious condition indicating laminitis or other problems.
The frog — the triangular, rubbery structure in the center of the sole. The frog plays a critical role in shock absorption and acts as a pump to assist blood circulation in the lower leg. A healthy frog is firm and relatively large; a small, shrunken frog may indicate lack of proper stimulation (too little barefoot activity on varied terrain) or disease.
The white line — the pale junction between the hoof wall and sole, visible on the bottom of the hoof. Separation of the white line (white line disease) allows bacteria and fungi to enter the hoof structure and can cause serious infection.
The heel bulbs — the soft, rounded structures at the back of the hoof. Cracking, thrush, and sensitivity in this area are common and worth monitoring.
The Farrier — Your Most Important Partner
< cite index=”35-1″>Schedule routine trimming or shoeing every 6–8 weeks in summer and 6–12 weeks in winter.</cite> The farrier — the professional who trims and shoes horses — is one of the most important members of your horse care team. Regular farrier visits maintain hoof balance (the alignment of the hoof relative to the leg), control hoof growth, and address any developing problems before they become serious.
Find a farrier before you need one urgently. Emergency farrier visits for a lost shoe or a horse suddenly going lame are stressful and expensive. Establish a relationship with a qualified farrier from the beginning and maintain the regular schedule they recommend.
Barefoot vs. shod: Not all horses need shoes. Many horses live and work successfully barefoot, particularly those on varied natural terrain that naturally wears the hoof. Horses doing more intensive work, those with specific hoof problems, or those working primarily on hard surfaces often benefit from shoes. Your farrier and veterinarian can advise on what is right for your horse’s specific workload and hoof quality.
Signs that indicate your farrier is needed sooner than scheduled:
- A shoe is loose, wobbling, or missing entirely
- Hoof cracks developing rapidly or appearing deep
- The horse is suddenly lame on one or more feet
- The hoof wall has grown excessively long and the horse is beginning to walk on its toe
- You notice significant imbalance in how the horse stands or moves
Common Hoof Problems Every Beginner Should Recognize
Thrush The most common hoof infection beginners encounter. < cite index=”43-1″>Standing in wet, dirty bedding can lead to hoof problems such as thrush.</cite> Thrush is a bacterial infection of the frog and its clefts, caused by prolonged contact with wet, dirty conditions. Symptoms include a dark, foul-smelling discharge from the frog clefts, and the frog tissue may appear eaten away in severe cases. Treatment involves thorough cleaning, keeping the environment dry and clean, and applying an antiseptic thrush treatment (iodine solution or commercial thrush preparations). If severe or not responding to cleaning, veterinary advice is needed.
Prevention: < cite index=”43-1″>Pick stalls multiple times per day if possible.</cite> Daily hoof picking, clean bedding, and avoiding prolonged turnout in muddy, wet conditions are the best preventive measures.
Laminitis (Founder) One of the most serious and painful hoof conditions a horse can experience. Laminitis is inflammation of the sensitive laminar tissue that connects the pedal bone to the hoof wall. In severe cases, the pedal bone can rotate downward and penetrate the sole — a condition known as founder.
Symptoms include:
- Sudden, severe lameness — often described as the horse “walking on eggshells”
- The horse shifting weight off its front feet, leaning back onto its heels
- Increased heat in the hooves
- A bounding digital pulse (a strong, elevated pulse felt in the artery at the back of the fetlock)
- Reluctance to move or turn
Laminitis is a veterinary emergency. If you suspect laminitis, call your vet immediately, restrict the horse’s movement, and do not allow it to continue moving on affected feet.
White Line Disease An infection of the white line (the junction between hoof wall and sole) where bacteria and fungi penetrate and damage the hoof wall from the inside. It appears as crumbling or powdery material in the white line area when the hoof is cleaned. Treatment involves the farrier trimming away affected tissue and antifungal treatment. Dry conditions and regular hoof cleaning prevent it.
Hoof Cracks Cracks in the hoof wall are common and range from superficial surface cracks (usually cosmetic and not concerning) to deep, structural cracks (potentially serious). Monitor any cracks for growth or deepening. A crack that reaches the coronary band (the soft tissue at the top of the hoof wall where new hoof grows) or that causes visible movement in the hoof wall with weight-bearing needs immediate farrier attention.
Bruising Visible as reddish or purple discoloration on the sole, bruising is caused by trauma — stepping on a stone, working on very hard or rocky ground. Mild bruising resolves on its own. Severe bruising can cause significant soreness and may need veterinary attention.
Part Five: Daily Health Checks — Reading Your Horse
Why Daily Checks Matter More Than Anything
Experienced horse people have a saying: “The best medicine is an observant eye.” Horses cannot tell you they are in pain. They cannot call the vet. They cannot describe what feels wrong. What they can do is show you — through subtle changes in behavior, posture, eating habits, and physical presentation — that something is not right.
Your job, as the person who cares for this horse daily, is to know that horse’s normal well enough to recognize the abnormal. This is a skill that develops through consistent, attentive daily observation — and it is the most important skill a horse owner can develop.
< cite index=”44-1″>Daily tasks such as grooming, hoof cleaning, environment checks, and hydration monitoring reinforce early issue detection.</cite>
The Daily Check — What to Look for Every Single Day
Overall demeanor and behavior < cite index=”46-1″>Are they bright, alert, and interested in their surroundings?</cite> A horse that is normally nickering at feed time and is today standing at the back of its stall, disinterested in food, is telling you something. Note any change from the horse’s established normal — dullness, lethargy, unusual agitation, or uncharacteristic behavior patterns all warrant closer investigation.
Eating and drinking Note whether the horse has finished its feed from the previous meal. Check water consumption — a horse that has not drunk normally in the past 12–24 hours may be dehydrated, experiencing mouth or throat pain, or developing colic. Most adult horses drink between 25–55 liters (6–14 gallons) of water daily — more in hot weather, heavy work, or during lactation.
Manure Checking the horse’s manure is unglamorous but genuinely important. You should see:
- Quantity: Roughly similar to previous days (a dramatic reduction in manure production can indicate reduced gut motility — a colic warning sign)
- Consistency: Formed, moist, and breaking apart easily when stepped on (very dry, hard balls suggest dehydration or reduced water intake; very loose manure can indicate stress, dietary change, or intestinal infection)
- Color: Varies with diet but should be consistent from day to day
- Absence of worms: Any visible worm segments in fresh manure need veterinary attention
Gut sounds (borborygmi) A healthy horse has continuous digestive sounds — the gurgling, rumbling, squeaking sounds of an active digestive system. These sounds should be audible on both sides of the abdomen. To check: place your ear against the horse’s flank (left side first, then right) or use a stethoscope if available. Listen for approximately 30 seconds on each side.
An absence of gut sounds is one of the most significant early warning signs of colic and should always prompt a call to your veterinarian.
Eyes Clear, bright, and fully open. Both eyes should appear equal in size and response. Any cloudiness, excessive tearing, discharge, squinting, or swelling around the eye needs veterinary attention promptly — eye problems in horses can deteriorate extremely rapidly.
Nostrils and breathing At rest, breathing should be quiet and effortless. A small amount of clear discharge from the nostrils is normal. Yellow, green, or thick discharge — or discharge from only one nostril — indicates infection and needs veterinary evaluation. Labored breathing, flared nostrils at rest, or a cough that persists beyond a brief clearing all warrant investigation.
Legs Run your hands down all four legs every day. You are feeling for:
- Heat: Any area significantly warmer than the surrounding tissue
- Swelling: Any puffiness, fluid accumulation, or enlarged areas
- Cuts or wounds: Check between the legs, in the heel bulbs, around the coronary band
- Sensitivity: The horse flinching or pulling away when a specific area is touched
Skin and coat condition Note any new patches of hair loss, flaky or crusty skin, raised bumps (hives/urticaria), or areas of swelling. Changes in coat condition — dullness, unusual dryness, excessive shedding outside of normal seasonal timing — can reflect nutritional, hormonal, or health issues.
Part Six: Taking Your Horse’s Vital Signs
The TPR — Your Baseline Health Measurement
Every new horse owner should learn to take their horse’s vital signs — known as TPR: Temperature, Pulse, and Respiration — and should establish the individual horse’s normal baseline readings before any health crisis occurs.
< cite index=”44-1″>These simple measurements offer early insight into pain, illness, or stress, often before any visible symptoms appear.</cite> When your horse is unwell and the veterinarian asks you for its vital signs over the phone, having accurate numbers to provide can significantly affect the advice you receive and the urgency of the response.
Practice taking vital signs when your horse is healthy and at rest — so you are comfortable with the technique and know what normal looks and feels like for your individual horse.
Temperature
< cite index=”30-1″>A horse’s normal body temperature ranges from 99°F to 101°F (37.2°C to 38.3°C).</cite>
Equipment: A digital rectal thermometer (clearly marked as exclusively for equine use).
How to take it:
- Stand to the side of the horse’s hindquarter — never directly behind
- Move the tail to one side
- Lubricate the thermometer tip with petroleum jelly or similar
- Gently insert the thermometer into the rectum to approximately two-thirds of its length, angling slightly upward
- Wait for the beep (digital thermometers typically take 30–60 seconds)
- Remove, read, and clean and disinfect immediately after use
When to call the vet: < cite index=”45-1″>If your horse’s temperature exceeds 102.5°F (39.2°C), contact your veterinarian immediately.</cite> A temperature below 99°F may indicate shock and also warrants veterinary contact.
Pulse (Heart Rate)
< cite index=”45-1″>A horse’s normal pulse range is 30 to 42 beats per minute.</cite>
Equipment: A stethoscope (preferred) or your fingertips.
With a stethoscope: < cite index=”45-1″>Place the stethoscope on the left side of the horse’s chest, just behind the elbow. Listen for the “lub-dub” sound of the heartbeat — this counts as one beat. Count beats for 15 seconds and multiply by 4 to get beats per minute.</cite>
Without a stethoscope: Feel for the pulse at the mandibular artery — the artery that runs along the inside of the lower jaw. Press two fingers gently against the jawbone and feel for the pulse. This takes practice.
Important: < cite index=”49-1″>A resting heart rate higher than 64 beats per minute signifies pain and possibly a more serious problem. A heart rate over 60 bpm indicates a severe condition and should be treated as an emergency.</cite>
Elevated heart rate in a horse that appears well otherwise can indicate pain — often the first measurable sign of colic.
Respiration Rate
< cite index=”44-1″>A normal respiration rate for a horse at rest is between 10 and 24 breaths per minute.</cite>
How to measure: Watch the horse’s flank (the area behind the barrel, above the stifle). Each visible rise and fall of the flank counts as one breath. Count breaths for 15 seconds and multiply by 4. Alternatively, watch the nostrils flare with each breath.
Important: Do not hold your hand near the horse’s nostrils to feel breath — this will alter the breathing rate as the horse investigates your hand.
Warning sign: < cite index=”49-1″>In healthy horses, the heart typically beats about four times for every breath — a ratio of approximately 4:1. If the respiration rate exceeds the heart rate, this is a serious warning sign that the horse may be in distress.</cite>
Capillary Refill Time (CRT)
A test of circulatory function and hydration. Press your thumb firmly against the horse’s upper gum (the pink tissue above the front teeth) for 2 seconds, then release and watch how quickly the color returns.
< cite index=”44-1″>A hydrated horse will pass this test — the color should return to normal in 1–2 seconds. Any longer indicates a circulation or dehydration problem.</cite>
The gum tissue should also appear pink and moist. Pale, white, blue, or brick-red gums indicate serious circulatory compromise — these are emergency findings requiring immediate veterinary contact.
Gut Sounds
As described earlier, listen to both sides of the abdomen. You should hear a variety of gurgling, rumbling, and fluid movement sounds. Note the relative activity — louder and more active on some days is normal; a complete absence of sounds on either side is not.
The Dehydration Pinch Test
Pinch a fold of skin on the horse’s neck or shoulder, hold for 2 seconds, and release. < cite index=”47-1″>The skin should snap back to normal in one or two seconds. Any longer indicates dehydration.</cite> Dehydrated skin stays “tented” for 3 or more seconds before flattening.
Normal Vital Signs — Quick Reference Card
| Measurement | Normal Range | Emergency Threshold |
|---|---|---|
| Temperature | 99–101°F (37.2–38.3°C) | Above 102.5°F — call vet |
| Heart Rate (resting) | 30–42 beats per minute | Above 60 bpm — emergency |
| Respiration Rate (resting) | 10–24 breaths per minute | RR exceeds HR — emergency |
| Capillary Refill Time | 1–2 seconds | Over 2 seconds — call vet |
| Gut Sounds | Active sounds both sides | Absent sounds — call vet |
| Skin Tent Test | Snaps back in 1–2 seconds | Tented over 3 seconds — dehydration |
Tip: Write your horse’s individual normal values in a notebook kept in the stable. When your horse is unwell, you will have its personal baseline to compare against — not just the textbook ranges.
Part Seven: Warning Signs — When to Call the Vet
Learning when something is an emergency versus something to monitor is one of the most important skills a new horse owner develops. When in doubt, call — a good equine veterinarian will always prefer to advise you on a non-emergency than to arrive at a crisis that could have been caught earlier.
Call the Vet Immediately For:
- Colic signs: Any combination of pawing, looking at flanks, rolling, lying down and getting up repeatedly, sweating without exertion, groaning, loss of appetite, absent gut sounds, elevated heart rate — these are signs of abdominal pain and colic is a medical emergency in horses
- Severe or sudden lameness: A horse that suddenly cannot bear weight on a leg
- Wounds that are deep, bleeding heavily, or near a joint — joint infections in horses are life-threatening
- Any eye injury or sudden change in eye appearance
- Temperature above 102.5°F (39.2°C)
- Heart rate consistently above 60 bpm at rest
- Pale, white, blue, or brick-red gums
- Labored breathing at rest or an unusual respiratory sound
- Signs of choke (head lowering, saliva and feed material dribbling from mouth, distressed swallowing)
- Suspected laminitis (as described above)
Monitor Carefully and Call if Concerned:
- Mild lameness that does not resolve within 24 hours
- Wounds that are superficial but large or in locations prone to contamination
- Slight nasal discharge that changes color or volume
- Mild diarrhea lasting more than 24 hours
- Unusual manure production (significantly less than normal)
- Behavioral changes that persist more than a day without obvious cause
- Minor swelling on a leg that is warm and does not reduce after light work
Part Eight: The Weekly and Monthly Routine
Weekly Tasks
Beyond the daily grooming routine, a weekly schedule keeps small tasks from becoming larger problems:
Deep grooming session. < cite index=”46-1″>Give your horse a thorough groom to remove caked-on mud, stimulate circulation, and bring out the natural oils in their coat.</cite> Spend extra time on areas that the daily session covers quickly — a full 30–45 minutes of unhurried attention.
Mane and tail care. < cite index=”46-1″>Gently detangle the mane and tail with your fingers or a wide-toothed comb. Use a detangling spray to avoid breaking the hair. Check the base of the tail for any skin irritation.</cite>
Water trough and feed bin cleaning. < cite index=”46-1″>Scrub your horse’s water trough and feed bins with a stiff brush to remove algae, slime, and old feed.</cite> Algae and bacterial growth in water troughs can reduce a horse’s willingness to drink — maintaining freshness is a genuine health measure.
Tack inspection. < cite index=”46-1″>Check your saddle, bridle, and any other equipment for wear and tear. Look for cracking leather or stretched stitching. Give it a wipe-down and condition leather as needed.</cite> A broken stirrup leather or cracking girth at a critical moment is a serious safety risk.
Environment check. < cite index=”43-1″>Inspect your horse’s environment to make sure it is safe. Horses can hurt themselves in even the safest environments. You can reduce the risk of injury by checking for broken boards, loose nails, loose baling twine, divots, or other hazards in stalls and fields.</cite>
Monthly and Seasonal Tasks
Bathing. < cite index=”48-1″>For most horses, full baths every 2–4 weeks in warm weather are plenty. Daily rinses with clean water are fine after sweaty rides.</cite> Never bathe a horse in cold weather unless you have thorough drying facilities — a wet horse in cold conditions is at risk for chilling and respiratory problems.
Seasonal coat care. < cite index=”48-1″>Spring brings heavy shedding — use a shedding blade or rubber curry to lift the loose winter coat. Ten minutes with a curry comb saves hours of cleanup later.</cite>
Parasite management. Work with your veterinarian to establish a deworming program appropriate for your horse, your region, and your management situation. Fecal egg counts — a laboratory test on a fresh manure sample — are now recommended as the most targeted approach to parasite management, replacing the old calendar-based rotation programs.
Dental care. Horses need their teeth examined and floated (filed) by an equine dentist or veterinarian at least once annually — more often for young horses, older horses, or those with known dental issues. Sharp points and uneven wear in a horse’s teeth cause pain during eating and can lead to significant weight loss.
Farrier schedule. Maintain the 6–8 week schedule your farrier recommends. Write the dates in your calendar. The cost of a missed appointment is rarely worth the consequences of overgrown, imbalanced hooves.
Part Nine: Building Your Grooming Routine — Practical Tips for Beginners
Start Slowly and Build Confidence
If you are entirely new to horses, do not attempt to learn everything at once. Begin with the simplest tasks — picking hooves and doing a basic brush-over — and add complexity as your confidence and skill develop. Ask your instructor, trainer, or a knowledgeable friend to demonstrate each tool and technique before you use it independently.
The horse will teach you too. Pay attention to what the horse is telling you through its body language and responses. A horse that relaxes and enjoys the grooming session is telling you that your pressure, rhythm, and technique are working. A horse that fidgets, swishes its tail, or pins its ears is telling you to adjust — pressure too hard, a sensitive area, or a tool that is uncomfortable.
Establish Consistency Above All Else
< cite index=”38-1″>A mindful grooming session creates space for health checks that help identify small problems before they escalate.</cite> The most important thing is not perfect technique — it is consistent presence. A horse groomed daily by an attentive, calm owner will be known so intimately that you will notice a 1°C change in temperature on one leg, or the fact that the horse drank slightly less than usual, or that it is holding its weight differently than yesterday.
That kind of knowing takes time, repetition, and daily presence. It cannot be shortcut or substituted.
Create a Grooming Station
Organize your grooming kit in a tote or bucket kept in a consistent, accessible location. Label your brushes (a system the horse’s hooves will appreciate) — particularly keep your face sponge and dock sponge clearly differentiated. A tidy, organized grooming kit means less time searching for tools and more time actually with your horse.
Conclusion: Every Day Is a Conversation
Horse ownership is, at its heart, a daily practice of attention. The grooming routine, the hoof picks, the vital sign checks, the scans for heat and swelling and behavioral change — these are not chores in the ordinary sense. They are a form of conversation with an animal that cannot speak but communicates constantly, fluently, and honestly to anyone who is paying close enough attention.
The beginner who establishes a thorough, consistent daily routine from the first day of ownership will, within a few months, know their horse with an intimacy that no amount of reading can substitute. They will feel the difference between a normal sigh of relaxation and a slightly labored breath. They will know which leg runs a degree warmer than the others. They will notice the moment the horse’s appetite changes, or its eyes lose their brightness, or its coat stops gleaming the way it should.
And in that knowing — built quietly, daily, through brush strokes and hoof picks and the simple act of being fully present — lies the foundation of all good horsemanship.
Start tomorrow. Start today. Pick up the hoof pick and begin.