
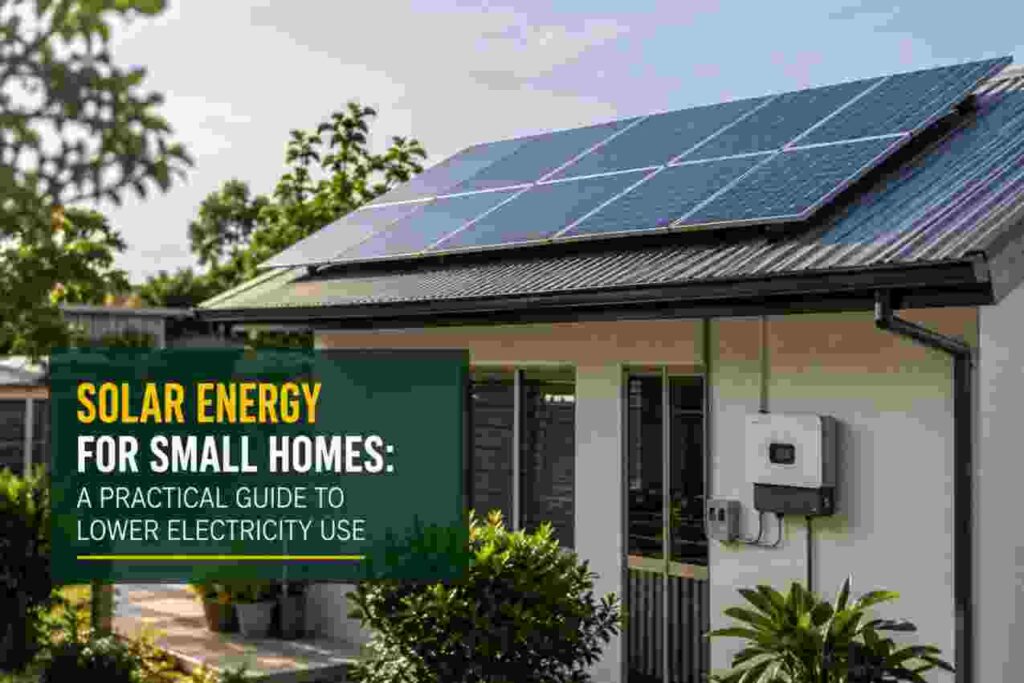
Introduction: Your Small Home, Your Solar Opportunity
Here is something the solar industry does not always say loudly enough: small homes are often the best candidates for solar energy.
Not the worst. The best.
Large homes with high electricity consumption and sprawling roof space get most of the attention in solar marketing. But a small, well-managed home with modest energy needs can achieve something a large home rarely can — near-total or total energy independence from a relatively small, affordable solar system.
The math is straightforward. A smaller home uses less electricity. A smaller solar system can cover that usage completely. That smaller system costs less to install, pays itself back faster, and can be sized more precisely to actual needs than a system for a sprawling property with unpredictable consumption.
Electricity prices have risen an average of 3–6% annually over the past decade, and most analysts expect that trend to continue. <cite index=”29-1″>The average American homeowner saves around $61,000 over 25 years after installing solar panels, with most solar shoppers saving between $37,000 and $154,000 — depending on their state, electricity rates, and system size.</cite> For a small home owner, those savings — scaled appropriately to smaller consumption — represent a genuine transformation of monthly household finances.
But solar energy still intimidates many small home owners. The terminology is unfamiliar. The upfront costs look daunting. The technology seems complex. The decisions — which panels, which inverter, which battery, which installer — feel overwhelming.
This guide cuts through all of that. It is written specifically for small home owners — people with modest square footage, limited roof space, and careful budgets — who want a clear, honest, practical understanding of what solar energy can do for them, what it will cost, and how to make the right decisions from the start.
By the end of this guide, you will know exactly what you need to know to make the single most impactful energy decision of your homeowning life.
Part One: Understanding How Solar Energy Actually Works
The Basic System — Simpler Than You Think
A residential solar energy system has four essential components. Understanding each one removes most of the confusion that surrounds solar conversations.
1. Solar Panels (Photovoltaic Modules) Solar panels — also called PV panels — are the flat, dark-colored units mounted on your roof or on ground-mounted frames. Each panel contains dozens of photovoltaic cells made primarily from silicon, which generate Direct Current (DC) electricity when struck by sunlight through the photovoltaic effect. Individual cells produce small amounts of power; connected in panels and panels connected in arrays, they produce usable quantities of electricity.
Modern residential solar panels convert between 20–23% of sunlight into electricity — a figure that has improved dramatically from the 15% efficiency of panels available a decade ago. The best premium panels now reach efficiencies above 23%.
2. Inverter Solar panels produce DC electricity. Your home runs on Alternating Current (AC). The inverter converts DC from your panels into the AC electricity your appliances, lights, and devices use. For small homes, there are two main inverter types worth knowing:
- String inverters — a single inverter connected to all panels in series; less expensive but means all panels are affected if one underperforms due to shading
- Microinverters — small individual inverters mounted on each panel; more expensive but each panel operates independently, maximizing output when partial shading is present
For small homes with limited roof space where panel positioning is precise, microinverters are increasingly worth the additional cost.
3. Electrical Panel and Wiring Your existing home electrical panel must be able to accommodate the solar system’s output. Many older homes require a panel upgrade — a cost often overlooked in early solar estimates but important to budget for. A licensed electrician will assess your panel during the site evaluation.
4. Battery Storage (Optional but Increasingly Popular) Battery systems store excess solar electricity generated during peak daylight hours for use during evenings, cloudy periods, or grid outages. For small homes aiming for genuine energy independence — or for homes in areas with unreliable grid power — battery storage is a significant enhancement. More on batteries in Part Five.
How Your Small Home Connects to the Grid
Most residential solar installations are grid-tied — connected to the utility grid. This means:
- When your panels produce more electricity than you use (typically midday on sunny days), excess power flows back to the grid
- When your panels produce less than you need (evenings, cloudy days), you draw from the grid as normal
- Under net metering policies, utilities credit your electricity bill for the power you export to the grid, effectively running your meter backward
<cite index=”33-1″>Net metering policies are the hidden savings multiplier: States with full retail rate net metering can double your effective savings compared to areas with reduced compensation rates, making policy research crucial before installation.</cite>
Net metering policies vary significantly by state and utility — some offer full retail credit for exported power, others offer reduced rates. Checking your local net metering policy is one of the first research steps to take before committing to solar.
Part Two: Is Your Small Home Ready for Solar?
Step 1 — Assess Your Roof
Your roof is the foundation of your solar system. Before any other planning, it needs honest assessment across four dimensions:
Orientation South-facing roofs in the Northern Hemisphere receive the most direct sunlight and are ideal for solar. <cite index=”22-1″>Ground-mounted systems consistently outperform roof installations by 10–15% due to optimal positioning, better cooling, and easier maintenance.</cite> However, for small homes without significant yard space, roof installation is typically the practical choice.
East-west facing roofs are workable — you may need slightly more panels to generate equivalent output. North-facing roofs in the Northern Hemisphere are the most challenging and often require professional assessment to determine feasibility.
Shading Shading is the enemy of solar performance. Trees, chimneys, neighboring buildings, and satellite dishes that cast shadows on panels during peak sunlight hours (roughly 10am–3pm) significantly reduce output. A quality installer will conduct a shade analysis using professional tools. Do not skip this step — shading issues that are missed in planning can reduce system output by 25–40%.
Roof Condition <cite index=”23-1″>A solar-ready roof needs at least 10–15 years of remaining life, 200–400 square feet of unshaded space, and a pitch between 15–40 degrees.</cite> If your roof is approaching end of life, replacing it before installing solar panels saves the significant cost and disruption of removing and reinstalling your solar system for a roof replacement mid-system-lifetime.
Available Space Small homes typically have limited roof space — which is precisely why accurate sizing matters so much. A standard residential solar panel measures approximately 65 × 39 inches and generates between 350–450 watts of peak power. A small home system of 3–5 kW requires roughly 8–14 panels, needing approximately 150–280 square feet of suitable roof space.
Step 2 — Understand Your Energy Consumption
Before sizing your solar system, you need to know how much electricity your home actually uses. Pull out the last 12 months of electricity bills and note your consumption in kilowatt-hours (kWh) for each month. This gives you:
- Your annual total consumption (the system should aim to offset this)
- Your monthly variation (useful for sizing to cover the highest-consumption months)
- Your baseline for calculating how much a solar system will save you
The average small home in the United States uses between 5,000–8,000 kWh annually — significantly less than the U.S. household average of approximately 10,500 kWh. <cite index=”22-1″>Most tiny houses require 3–10 kWh daily, but seasonal variations can double energy needs — size your system for peak demand periods including heating/cooling loads to avoid undersizing mistakes.</cite>
The audit opportunity: Before installing solar, consider a professional energy audit. <cite index=”25-1″>A professional energy audit costs $300–$500 but can identify savings opportunities worth thousands. Energy efficiency improvements can reduce your home’s energy consumption by 20–50%, which directly translates to needing fewer solar panels, a smaller wind turbine, or a less powerful geothermal system.</cite>
Reducing your consumption before installing solar means you need a smaller, less expensive system to cover your needs — and smaller systems pay back faster.
Step 3 — Know Your Sun Hours
Solar output depends on how many peak sun hours your location receives daily. Peak sun hours are not the same as daylight hours — they represent the hours of sunlight intense enough to produce rated panel output.
Average peak daily sun hours by region (approximate):
| Region | Peak Sun Hours/Day |
|---|---|
| Southwest (Arizona, Nevada, Southern California) | 5.5–7.5 |
| Southeast (Florida, Texas, Georgia) | 4.5–6.0 |
| Midwest (Illinois, Ohio, Missouri) | 3.5–4.5 |
| Northwest (Washington, Oregon) | 3.0–4.0 |
| Northeast (New York, Massachusetts) | 3.5–4.5 |
| Hawaii | 5.5–6.5 |
These figures directly affect how large your system needs to be. A home in Arizona needs fewer panels to generate the same annual electricity as an identical home in Oregon.
Part Three: Sizing the Right Solar System for a Small Home
The Simple Sizing Formula
System sizing for a small home follows a straightforward calculation:
Step 1: Divide your annual electricity consumption (kWh) by 365 to get your daily average consumption.
Example: 6,000 kWh ÷ 365 = 16.4 kWh per day
Step 2: Divide your daily consumption by your location’s peak sun hours to get the system size needed in kilowatts (kW).
Example: 16.4 kWh ÷ 4.5 hours (Midwest) = 3.6 kW system needed
Step 3: Divide the system size in watts by the wattage of the panels you’re considering to get the number of panels.
Example: 3,600 W ÷ 400 W per panel = 9 panels
This gives you a starting point. A reputable installer will refine this calculation accounting for local shading, roof angle, inverter efficiency losses (typically 10–20% of panel output), and your specific energy goals.
Right-Sizing for Small Homes — The Key Principle
The most common mistake small home owners make when going solar is over-sizing their system based on optimistic future consumption growth. For a small home with carefully managed energy use, a right-sized system that covers 90–100% of current consumption is typically more financially sound than an over-sized system covering 130% of consumption.
Recommended small home system sizes by daily consumption:
| Daily Usage | Recommended System Size | Estimated Panels Needed |
|---|---|---|
| Under 10 kWh/day | 2–3 kW | 5–8 panels |
| 10–15 kWh/day | 3–4 kW | 8–11 panels |
| 15–20 kWh/day | 4–5 kW | 11–14 panels |
| 20–25 kWh/day | 5–7 kW | 14–18 panels |
Part Four: The Real Costs of Solar in 2026
What Solar Actually Costs Right Now
Solar costs have fallen dramatically over the past 15 years. <cite index=”31-1″>Installed solar costs $2.50–$3.50/W in 2026 — down more than 60% from roughly $10–$12/W around 2010.</cite>
For a small home, the most relevant system sizes and their 2026 cost ranges:
| System Size | Estimated Installed Cost (Before Incentives) | Typical Small Home Suitability |
|---|---|---|
| 2 kW | $5,000–$7,000 | Very small home, minimal consumption |
| 3 kW | $7,500–$10,500 | Small home, efficient energy use |
| 4 kW | $10,000–$14,000 | Small home, average consumption |
| 5 kW | $12,500–$17,500 | Small home, moderate consumption |
| 6 kW | $15,000–$21,000 | Small home, higher consumption |
Important 2026 update on incentives: <cite index=”31-1″>The 30% federal Residential Clean Energy Credit (25D) expired December 31, 2025; systems installed in 2026 no longer qualify.</cite> This is a significant change from previous years. If you were planning your solar installation with the 30% federal credit in mind, adjust your financial calculations accordingly — your out-of-pocket cost will be approximately 30% higher than figures from pre-2026 estimates.
<cite index=”30-1″>Without the federal tax credit, your overall solar cost or loan amount will be about 30% higher. Your payback period extends by a few years. But your total savings over the system’s lifetime remain substantial for most homes with good solar potential.</cite>
State and local incentives remain available and can substantially offset costs. Many states offer their own solar tax credits, utility rebates, property tax exemptions for solar installations, and sales tax exemptions on solar equipment. Research your specific state’s current incentives through the Database of State Incentives for Renewables & Efficiency (DSIRE) at dsireusa.org before committing to a purchase.
Understanding Your Payback Period
The payback period — the time for your electricity savings to equal your system’s cost — is the most important single financial metric for evaluating solar.
<cite index=”31-1″>Most systems pay back in 7–12 years, then produce nearly free power for a decade-plus.</cite> Without the federal tax credit, expect payback periods in the 9–14 year range for 2026 installations, depending on your location, electricity rate, and system size.
<cite index=”28-1″>If your electricity rate is above roughly $0.14–$0.16 per kWh and you have decent sun, your payback period is often under 12 years, with 15+ years of low-cost power after that. In regions with high rates (such as parts of California, the Northeast, and Hawaii), well-designed systems can pay back in under 7–9 years.</cite>
State-by-state payback period examples (2026, without federal credit):
| State | Average Electricity Rate | Estimated Payback Period |
|---|---|---|
| Hawaii | $0.41–0.43/kWh | 5–8 years |
| California | $0.28–0.32/kWh | 7–10 years |
| Massachusetts | $0.26–0.30/kWh | 8–11 years |
| New York | $0.22–0.26/kWh | 9–12 years |
| Texas | $0.13–0.16/kWh | 11–15 years |
| Louisiana | $0.09–0.11/kWh | 15–20 years |
After your payback period, <cite index=”35-1″>all electricity savings become pure profit for the remaining 15–20+ years of your system’s life. A typical residential system continues generating $50,000–100,000 in additional savings after payback, while also providing protection from rising electricity rates that increase 2.6% annually.</cite>
How to Finance Your Solar System
Option 1: Cash Purchase The highest upfront cost but the best long-term financial outcome. You own the system outright, claim all incentives directly, and benefit from the full value of every kilowatt-hour generated. For small home systems in the $8,000–$15,000 range, cash purchase is achievable for many households.
Option 2: Solar Loan Many banks, credit unions, and solar-specific lenders offer loans for solar installations. <cite index=”29-1″>How you finance your system can increase total costs by 20–47% compared to paying cash — and hidden dealer fees of 15–30% can inflate your loan balance well above the actual system price before a single interest charge applies.</cite> Read loan terms carefully, compare multiple lenders, and calculate the total cost including all interest before committing.
Option 3: Solar Lease / Power Purchase Agreement (PPA) A third party owns and installs the system on your roof; you pay a fixed monthly lease payment or a set price per kWh. There is typically no upfront cost, but you do not own the system, cannot claim tax credits, and may not benefit from the full financial value of the installation. Lease agreements can also complicate home sales. For most small home owners who can afford the upfront cost or qualify for a reasonable loan, ownership is financially superior to leasing.
Option 4: PACE Financing (Property Assessed Clean Energy) Available in some states, PACE financing attaches the solar loan to your property rather than to you personally, repaid through your property tax bill. No upfront cost, and the financing transfers with the home if you sell. Check PACE availability in your state.
Part Five: Battery Storage — Do You Need It?
The Battery Decision for Small Homes
Battery storage is the most rapidly evolving segment of residential solar technology — and for small home owners, it presents one of the most important and most personal decisions in the system design process.
The case for batteries:
- Energy independence: With adequate battery storage, your small home can operate entirely on solar power 24 hours a day during periods of good sun, using stored energy at night
- Grid outage protection: During power outages, a battery system can keep your essential appliances running — lights, refrigerator, phone charging, medical equipment — while grid-tied systems without batteries automatically shut down for safety reasons
- Net metering optimization: In states with reduced net metering rates (where the utility pays you less for exported power than you pay for imported power), batteries allow you to store and use your own solar electricity rather than exporting it at low rates
The case for waiting:
- Batteries add significant cost — typically $8,000–$15,000 for a quality home battery system — which extends the payback period
- Battery technology is improving rapidly; today’s leading batteries will likely be surpassed by significantly better options within 5 years
- If your utility offers good net metering rates, the grid itself effectively functions as a free battery — you store energy there when you have excess and draw it back when you need it
<cite index=”22-1″>LiFePO4 batteries now offer 6,000+ cycle lifespans with 95% efficiency and 80–100% usable capacity, making them the clear choice over traditional AGM batteries despite higher upfront costs.</cite>
For small homes specifically: If your primary goal is electricity bill reduction and your utility offers reasonable net metering, a grid-tied system without batteries is typically the right starting point. Add batteries later — either when the technology improves further, when your utility reduces its net metering terms, or when energy independence becomes a higher priority.
If grid reliability is a concern in your area, or if you are in a location with significant storm/outage risk, a small battery backup sized to cover essential loads (typically 5–10 kWh for a small home) is worth the investment.
Leading Battery Options for Small Homes (2026)
Tesla Powerwall 3 — 13.5 kWh capacity, integrated inverter, sleek design, excellent software management. One of the most widely installed home batteries in the market. Well-suited to small homes needing reliable backup with smart energy management.
Enphase IQ Battery 5P — Modular design allowing you to start with a single unit and add more over time. Pairs particularly well with Enphase microinverter systems. Excellent monitoring software. Good choice for small homes starting with modest battery capacity.
Franklin Electric aPower Ultra — 13.6 kWh capacity with whole-home backup capability. Strong warranty terms and solid performance in independent testing.
DIY LiFePO4 systems — For technically capable homeowners, assembling a battery system from individual LiFePO4 cells and a battery management system can reduce costs by 40–60% compared to branded turnkey solutions. Requires electrical knowledge and careful attention to safety and local code compliance.
Part Six: Reducing Electricity Use Before and After Solar
The Golden Rule: Reduce First, Then Generate
The most financially efficient approach to solar for small homes is always the same: reduce your electricity consumption as much as practical before sizing your solar system.
Every kilowatt-hour you save through efficiency measures is a kilowatt-hour you do not need to generate — and saving a kWh through efficiency typically costs less than generating one through solar panels.
Here are the highest-impact efficiency improvements for small homes:
Lighting — The Easiest Win
If your home still has any incandescent or CFL bulbs, replacing them with LED lighting is the single most cost-effective electricity reduction available. LED bulbs use 75–80% less electricity than incandescent equivalents and last 15–25 times longer.
A small home with 20 light fixtures switching from incandescent to LED can save 400–600 kWh annually — the equivalent output of roughly half a solar panel — at a cost of perhaps $60–100 in bulbs.
Appliances — Know Your Energy Hogs
The major electricity consumers in a typical small home, in roughly descending order:
HVAC (Heating, Ventilation, and Air Conditioning) — typically accounts for 40–50% of a home’s electricity use. A smart thermostat (Nest, Ecobee, or similar) can reduce HVAC electricity use by 10–15% with minimal comfort sacrifice by learning your patterns and optimizing temperature schedules. Cost: $150–$250.
Water Heater — electric water heaters are significant consumers. Consider a heat pump water heater if replacing your water heater — they use 60–70% less electricity than standard electric resistance heaters and qualify for state incentives in many markets.
Refrigerator — older refrigerators use significantly more electricity than modern ENERGY STAR models. A refrigerator over 10 years old may use 3–4 times more electricity than a current efficient model.
Washer and Dryer — washing in cold water reduces water heater load substantially. If possible, line-dry clothes when weather permits — a clothes dryer is one of the highest-draw appliances in a typical home.
Phantom loads — electronics, chargers, and appliances on standby consume electricity continuously. A smart power strip or the habit of unplugging unused electronics can save 5–10% of total household electricity with no lifestyle impact.
Insulation and Air Sealing — The Foundation of Efficiency
<cite index=”25-1″>The most impactful efficiency upgrades typically include air sealing, with a $350–$600 investment delivering 10–20% energy savings.</cite> For small homes, air sealing — blocking the tiny gaps around doors, windows, electrical outlets, and plumbing penetrations through which conditioned air escapes — is one of the most impactful and affordable efficiency measures available.
Proper insulation in the attic (the primary site of heat loss in most homes) dramatically reduces both heating and cooling loads, directly reducing electricity consumption and the solar system size needed to cover it.
Part Seven: Choosing an Installer and Avoiding Common Mistakes
How to Find and Evaluate Solar Installers
<cite index=”21-1″>Complex systems often benefit from professional installation to ensure safety and optimal performance.</cite> For small home owners, professional installation is the right choice for roof-mounted systems — but choosing the right installer requires careful evaluation.
Look for these credentials:
- NABCEP certification (North American Board of Certified Energy Practitioners) — the gold standard credential for solar installers; NABCEP-certified installers have demonstrated comprehensive technical knowledge and ethical standards
- Proper state electrical contractor licensing
- General liability and workers’ compensation insurance — critical for protecting you if anything goes wrong during installation
- Experience specifically with residential systems similar in size to yours
Get multiple quotes: Get at least three detailed quotes from different installers. Quotes should itemize panel brand and model, inverter type and brand, number of panels, estimated annual production in kWh, warranty terms, and all-inclusive pricing. Be wary of quotes that lack this detail.
Check reviews and references: Solar installation is not a commodity service — installer quality varies enormously. Check Google reviews, the Better Business Bureau, and ask installers for references from homeowners with systems similar to yours. A site visit to see an installed system from a potential installer is worthwhile if you can arrange it.
Understand your warranties:
- Panel manufacturer warranty: Top-tier panels carry 25-year product warranties and 25-year performance warranties (typically guaranteeing at least 80–90% of rated output after 25 years)
- Inverter warranty: String inverters typically carry 10-year warranties, extendable to 25 years for additional cost. Microinverters typically carry 25-year warranties
- Installer workmanship warranty: Typically 5–10 years; covers installation defects and roof penetration waterproofing
8 Common Mistakes Small Home Solar Buyers Make
Mistake 1: Not getting their roof inspected first. Installing panels on a roof that will need replacement in 3–5 years means paying significant costs to remove and reinstall the system.
Mistake 2: Over-sizing the system. Bigger is not always better. Right-size to your actual consumption — don’t pay for generation capacity you won’t use.
Mistake 3: Ignoring shading. Even partial shading of one panel can reduce output of an entire string. Insist on a professional shading analysis.
Mistake 4: Choosing the cheapest quote. The least expensive installer is often the least experienced. In solar, installation quality directly affects 25+ years of system performance.
Mistake 5: Not checking net metering policies. Your utility’s net metering terms directly affect your financial return. Know what you will receive for exported power before committing.
Mistake 6: Forgetting about panel degradation. <cite index=”31-1″>Quality panels degrade only ~0.5%/year and carry ~25-year warranties.</cite> This is modest and expected — but factor it into long-term savings projections.
Mistake 7: Making the decision without a home energy audit. Reducing consumption before installing solar is almost always financially smarter than over-sizing your system to cover inefficient consumption.
Mistake 8: Underestimating permit and interconnection timelines. Solar installations require building permits and utility interconnection approval, which can take 4–12 weeks depending on your jurisdiction. Factor this into your timeline expectations.
Part Eight: Monitoring and Maintaining Your Solar System
What Ongoing Maintenance Does a Solar System Need?
One of the genuine advantages of solar energy systems is their extremely low maintenance requirements. Solar panels have no moving parts, require no fuel, and are designed to operate for 25+ years with minimal intervention.
Routine maintenance tasks:
Annual cleaning — Dust, bird droppings, and debris accumulation on panels reduces output. In most climates, rainfall provides sufficient natural cleaning. In dusty climates (desert Southwest, for example) or areas with heavy bird activity, manual cleaning with water and a soft brush 1–2 times annually can restore 5–10% of output.
Annual visual inspection — Check for visible damage to panels, mounting hardware, and wiring. Look for signs of water intrusion around roof penetrations. Inspect inverter status indicators for any fault codes.
Monitoring system review — Most inverter systems include monitoring software accessible via smartphone app or web browser. Check your system’s production regularly and compare it to expected output for the season. Unexpected drops in production are the earliest indicator of a problem that needs attention.
Inverter maintenance — String inverters may require replacement once during a system’s lifetime (typically after 10–15 years). Microinverters, with 25-year warranties, are designed to match panel lifetime.
Tree trimming — Growing trees that were not shading your panels at installation may create shading issues over time. Monitor and trim as needed.
Understanding Your Monitoring System
Modern solar systems include sophisticated monitoring that tracks panel-by-panel production (with microinverters), system-wide output, electricity consumption, and battery state (if applicable). Use this data actively:
- Compare daily and monthly production against the estimated production in your installer’s proposal — this is the baseline your system should meet
- Look for patterns — significant drops on sunny days indicate a potential issue
- Track your actual electricity bills against pre-solar bills to verify your savings are materializing as projected
Part Nine: Real Numbers — What a Small Home Solar System Delivers
A Practical Example
Let’s build a real example to tie everything together.
The home: A 900-square-foot home in Nashville, Tennessee. Annual electricity consumption: 7,200 kWh. Average electricity rate: $0.13/kWh. Annual electricity bill: approximately $936.
The system: A 4 kW solar system (10 × 400W panels).
- Estimated annual production: approximately 5,200 kWh (Nashville averages 4.5 peak sun hours/day)
- Coverage of consumption: approximately 72%
- Remaining grid electricity purchase: approximately 2,000 kWh/year
- Annual electricity savings: approximately $676
The cost (2026, no federal credit):
- Installed system cost: approximately $12,000
- Tennessee state incentives (approximately $1,500 credit): net cost approximately $10,500
- Simple payback period: 10,500 ÷ 676 = approximately 15.5 years
Over 25 years:
- Total electricity savings (assuming 3.5% annual rate increase): approximately $29,000
- Net gain after system cost recovery: approximately $18,500
- Plus: home value increase (studies show solar adds approximately $3–4/watt of system capacity to home value in most markets, so approximately $12,000–$16,000 for this system)
Now with efficiency improvements first: If the homeowner first invests $2,000 in efficiency improvements (LED lighting, smart thermostat, air sealing) and reduces annual consumption from 7,200 kWh to 5,500 kWh, a 3 kW system covers 84% of consumption, costs approximately $8,500 after state incentives, and has a payback period of approximately 11 years — while saving an additional $2,000 on the solar system cost.
This example illustrates the core principle: efficiency first, then right-sized solar.
Part Ten: Special Considerations for Small Home Types
Apartments and Condos — Community Solar as the Alternative
If you own a condominium or live in a community with HOA restrictions that prevent rooftop solar, community solar is the practical alternative. Community solar programs allow subscribers to purchase or lease a share of a large, offsite solar installation and receive credits on their electricity bill proportional to their share’s production.
Community solar typically requires no installation, no maintenance, and no long-term commitment — making it the closest equivalent to rooftop solar for apartment and condo dwellers. Check whether your utility offers a community solar program or use the national community solar database at energysage.com/community-solar.
Mobile Homes and Manufactured Housing
Mobile homes and manufactured housing present specific structural considerations for solar installation. Roof load capacity and the structural framing of manufactured homes differ significantly from site-built homes and require careful evaluation by an installer experienced with this housing type.
Ground-mounted systems — where panels are mounted on frames in the yard rather than on the roof — are often the preferred solution for manufactured homes with suitable land. <cite index=”22-1″>Ground-mounted systems consistently outperform roof installations by 10–15% due to optimal positioning, better cooling, and easier maintenance.</cite>
Older Homes
Homes built before 1980 often have electrical panels that need upgrading before solar can be safely installed. A 100-amp service panel — common in older homes — may need upgrading to 200-amp service, which adds $1,500–$3,000 to installation costs but is worth budgeting for accurately from the start.
Your Solar Action Plan: Step by Step
If you have read this far and are ready to move forward, here is your clear action plan:
Step 1 — Reduce first. Conduct a DIY energy audit. Install LED lighting throughout. Add a smart thermostat. Seal obvious air gaps around windows, doors, and outlets. Assess your major appliances for efficiency upgrade opportunities.
Step 2 — Gather your data. Collect 12 months of electricity bills. Note your annual kWh consumption. Find your location’s average peak sun hours. Check your state’s current solar incentives at dsireusa.org.
Step 3 — Assess your roof. Walk around your home and assess south-facing roof area, condition, and obvious shading. If the roof is more than 15 years old, get a roofing inspection before requesting solar quotes.
Step 4 — Get three quotes. Contact three NABCEP-certified installers for quotes. Ensure quotes specify panel brand and model, inverter type, number of panels, estimated annual kWh production, and all-inclusive pricing. Do not accept quotes without itemized detail.
Step 5 — Evaluate the quotes. Compare not just price but estimated production, panel and inverter quality, warranty terms, and installer reputation. The highest-quality system from the most reputable installer is almost always the right choice over the cheapest quote.
Step 6 — Decide on batteries. Based on your utility’s net metering policy, your local grid reliability, and your energy independence goals, decide whether to include battery storage from the start or add it later.
Step 7 — Finalize financing. Compare cash purchase, loan terms, and any available PACE financing. Calculate the total cost of financing options including all interest and fees before committing.
Step 8 — Permit and install. Your installer will handle permitting and utility interconnection paperwork. Expect 4–12 weeks from signed contract to system activation.
Step 9 — Monitor and optimize. Use your system’s monitoring software actively. Track monthly production against estimates. Review your electricity bills to confirm savings are materializing. Schedule an annual visual inspection.
Conclusion: Small Home, Big Opportunity
Solar energy is not just for large homes with sprawling roof space and enormous electricity bills. In many ways, a small home with efficient energy habits and a precisely sized solar system is the perfect solar candidate — achieving high coverage of consumption, faster payback, and genuine energy independence at a cost that a household budget can actually accommodate.
The investment in solar is, at its core, a decision to take control of your energy future. It is a hedge against rising electricity rates that have increased reliably for decades. It is a reduction of your home’s carbon footprint. And in most locations with reasonable sun exposure and electricity rates, it is a genuinely sound long-term financial decision that pays for itself and then generates significant returns for the remaining life of the system.
The federal tax credit that made 2025 a landmark year for solar adoption has expired. But the technology keeps getting better, the costs keep coming down, and the case for solar for small homes remains as strong as ever.
Do the math for your home. Talk to installers. Make the right decision with full information.
Your small home is ready for solar. The question is simply: when will you be ready to start?